Professional ISO Software which can Edit ISO, Make ISO, Convert ISO, Burn ISO and Mount ISO

ISO Editor: Powerful and convenient, WinISO as a professional ISO editor which helps you edit ISO or other image file(s). It can open/add/delete/rename/ the ISO file and any other CD/DVD/Blu-ray Disc image files. Not enough, it can also extract files from ISO file and CD/DVD/BD image file.
Here we will show you how to edit ISO image files you want with WinISO step by step.
This article includes 4 steps.
1. Getting Started
2. Open File
3. Choose an option you want to pick
4. Save
Step 1: Getting Started
Download and Run WinISO
Free Download WinISO from our official website and then install it. It will just take you several seconds.
Step 2: Open File
After WinISO is running, click the "Open File" to open an existing ISO file or any other CD/DVD/Blu-ray Disc image file(s), or drag your file(s) and directories from Windows Explorer into WinISO.

Step 3: Choose an option you want to pick
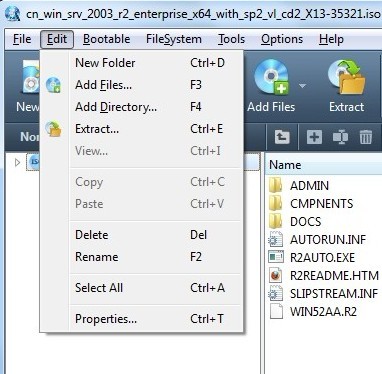
Click "Edit" on the menu bar to select an action.

(I) Please click "Add Files" or “Add Directory” or you can use the shortcuts: press “F3” or “F4” to add a file, or select an ISO file and click "Delete" to delete a file.

(II) You may also note that WinISO not only supports adding and deleting an ISO image file, but also supports renaming ISO image files to satisfy your demand for every ISO editing.
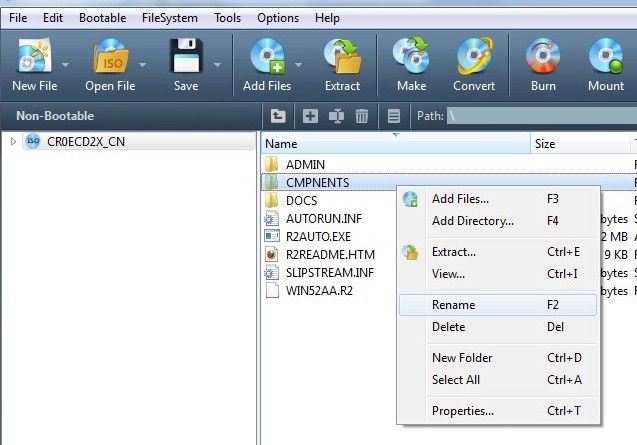
Click "Rename" on the "Edit" menu or by right-clicking on the File's name. Then enter in the new name you like.

(III) Click "Extract" on the "Edit" menu or click the "Extract" button on the toolbar. Set the location from the drop-down list for extract ISO file(s), then click "OK" to start.

Step 4: Save
Afterward, click "Save" button, and confirm that you have a new ISO file.

Now your action is completely successfully.
For more guides, please take closer look here:
