Professional ISO Software which can Edit ISO, Make ISO, Convert ISO, Burn ISO and Mount ISO

In Windows 7, to mount an ISO disk image for installing software or recover backup files, you need to install a third-party utility. Now here comes WinISO Standard 6 which will allow these older versions of Windows mount ISO files as virtual CD-ROM/ DVD-ROM drives.
Mount ISO is one of the main features of WinISO. It’s dead simple so that the novice can also handle it with ease.
Here we will show you the way to mount ISO image in Windows 7 step by step.
Step 1: Download and Run WinISOFree Download WinISO from our official website and install it. It will just take you several seconds.
Step 2: Click "Mount"
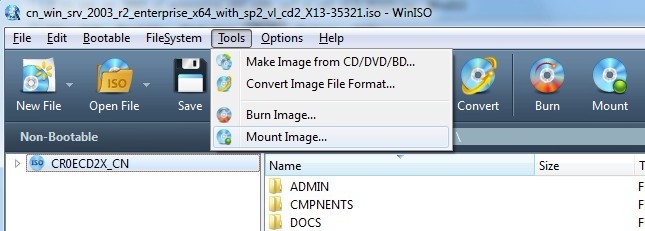
Run WinISO, open the ISO file. Click "Mount" on the toolbar, or you can also click "Tools" on the menu, then choose "Mount Image".

Step 3: Click "Open in Explorer"
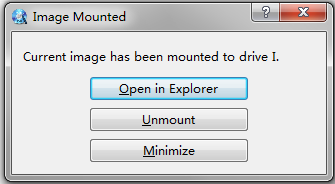
A few seconds later, you will get a message: Current image has been mounted to Drive H(as an example). Then click "Open in Explorer". The extracted file list will appear in the drive.

Furthermore, you can also stop mounting the image files by pressing "Unmount".
For more guides, please take closer look here:
